The GridPane knowledgebase can be quite technical and intimidating. Here’s a simple summary of the steps required to allow your developer to access sites in GP.
For FILES access only (via SFTP)
If your developer only needs file access, add the person as a System User to your site. This limits his/her exposure to that specific site and not the entire server.
- GridPane > Add System User > Add Username & Password (no need Public Key)
- Assign new system user to the Site and note the Server IP
- Provide Username, Password, and Server IP to your developer, for SFTP access via FileZilla or similar.
- Repeat steps 1-3 for a new server (username/password can be the same)
- For the occasional database access, use the WP phpMyAdmin plugin instead
Full tutorial: https://gridpane.zendesk.com/hc/en-us/articles/360033599471-Add-a-System-User-to-a-GridPane-Server (step 1 and half of step 2 is enough)
For FILES & DATABASE access
Gridpane will only allow direct database connections for Root users via SSH, so be sure you either trust the developer with the rest of your sites on that server, or only have that one site on that server.
Full tutorial: https://gridpane.zendesk.com/hc/en-us/articles/360036735611-Generate-SSH-Key-on-Windows-with-Putty (with 7-min video)
Step 1: Create an SSH key
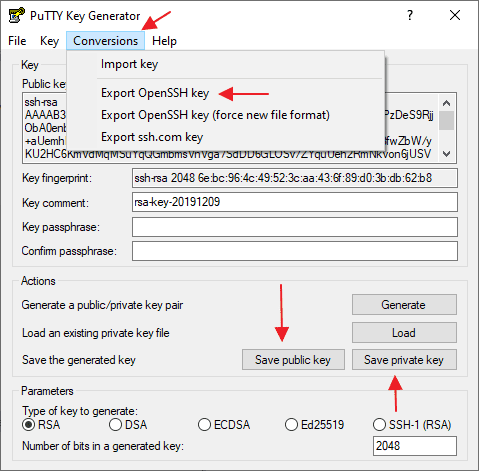
- Download Puttygen (not to be confused with Putty), and launch
- Generate public/private key pair
- Passphrase not needed
- Copy the text in the box (ssh-rsa…) and paste it in a txt file username-publicsshrsa.txt
- Conversations > Export OpenSSH key > username-privateopenssh.key
- Save public key > username-publickey.key
- Save private key > username-privatekey.ppk
- Save these 3 files somewhere safe.
Step 2: Add Public Key to Gridpane
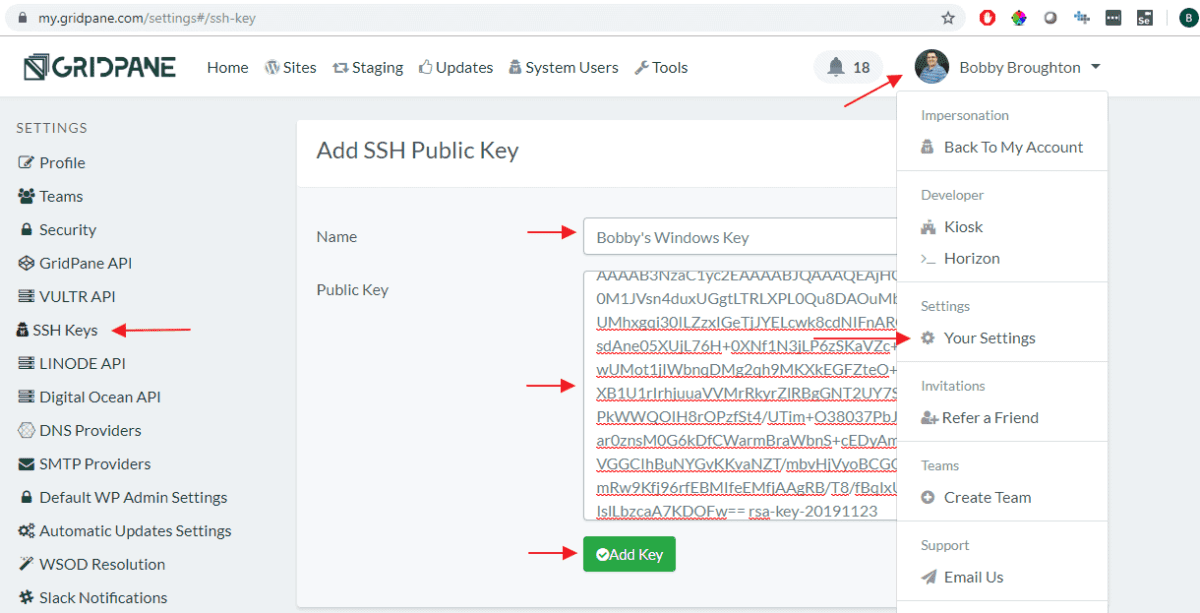
- Gridpane > Your Settings > SSH Keys > Add SSH Public Key
- Paste key as text from username-publicsshrsa.txt
Step 3: Push key to Gridpane server
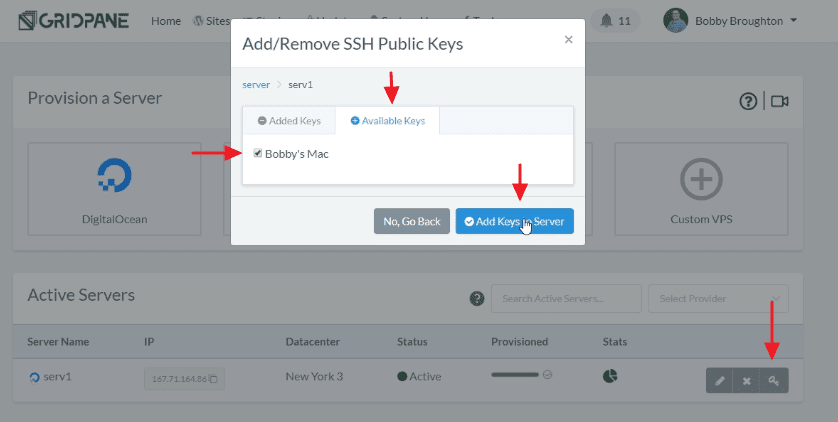
- Gridpane > Home > Server > Key icon > Available Keys > Username > Add key to server
Step 4: Add Private Key to Putty
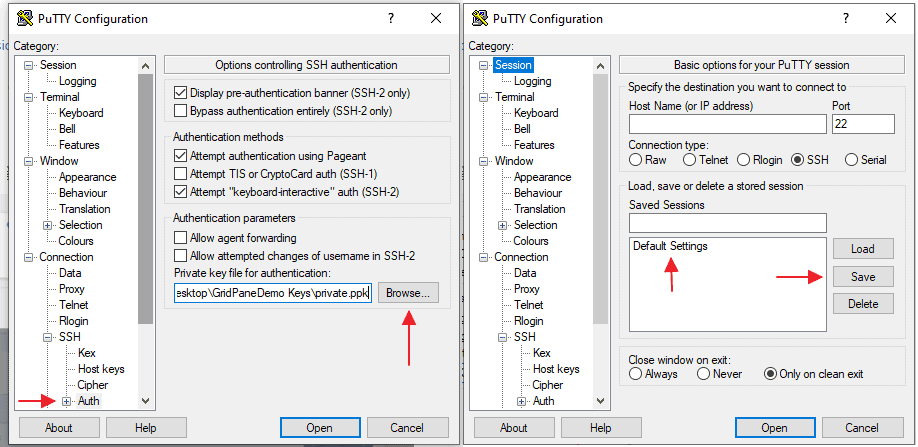
- Putty > Connection > SSH > Auth > Upload Private Key > username-privatekey.ppk
- Putty > Session > Default Settings > Save
Step 5: Connect
Your developer should be familiar with connecting to the server, but for completion’s sake I’ll include links here.
For file access: Connect via Filezilla
Full tutorial: https://gridpane.zendesk.com/hc/en-us/articles/360033232872-Connect-to-a-GridPane-Server-by-SFTP-as-Root-user
For database access: Connect via MySQL client
Full tutorial: https://gridpane.zendesk.com/hc/en-us/articles/360033232672-Connect-a-desktop-MySQL-client-with-a-database-by-SSH-as-root
For terminal access: Connect via Putty
- Session > IP Address > Open
- CLI > Login as: root
- Done!
Full tutorial: https://gridpane.zendesk.com/hc/en-us/articles/360036735611-Generate-SSH-Key-on-Windows-with-Putty (step 5)
